Extending the Contentful UI
A difference between using a headless CMS and a traditional one is that you do not have the same control over the editing experience of the editors since the actual editing interface is in the cloud and not on premise. Does that mean that we cannot give editors custom editor controls? A while back I posted a pretty in depth article on how to extend the EPiServer editing interface with a custom control for creating polls. It took quite a lot of pain and effort to get that working. I was curious how I could achieve the same thing using Contentful and read up a bit about it on their site. It turns out it isn’t that hard at all to create your own custom edit controls in Contentful!
A word of warning!
The UI extension API is still in development and likely to change over time. It is therefore not recommended to use for business
critical solutions at this time.
There’s a whole section over at the Contenful site dedicated to UI extensions which is nice. What’s even better is that it’s all open source and can be found on GitHub. What really blew me away when browsing through the examples though was this: https://github.com/contentful/widget-sdk/tree/master/examples/chessboard
What!? There’s an example of an UI extension to show a chessboard! That is just beyond awesome. People that know me also know how much I love chess. If there’s one extension that every CMS needs it’s this one!

Anyway! Lets get on with our poll extension. To get started it is easiest to download and use the CLI tool provided by Contentful.
You can find it on github here. You install it through NPM
(if you do not have Node or NPM you can just go to nodejs.org and download and install).
Simply run npm install -g contentful-widget-cli. The global (-g) flag is to make sure the CLI is available to
us globally on our machine.
Once we have the CLI tool installed we can run commands directly in our command prompt to create, read, update and delete UI
extension widgets from Contentful. To do that we simply run contentful-widget [command] [options] where command can be any of
create/read/update/delete and options can be a number of options for each command separately. To list available options we can run
each command with the –help option.
Before we get into creating the actual widget there’s one more thing to set up. When using the CLI it will need to authenticate
with Contentful to make sure you are authorized to upload and modify widgets. This is done by creating an OAUTH authentication
token and setting it in an environment variable. To obtain a token you simply login to contentful and
generate one here. We then set
the environment variable. I did it using powershell like this: $env:CONTENTFUL_MANAGEMENT_ACCESS_TOKEN = "TOKEN"
For windows users the Contentful documentation is missing the bits of how to set up the environment variable, it simply tells you to
run export CONTENTFUL_MANAGEMENT_ACCESS_TOKEN = "TOKEN" which is not a command that exists in windows. However you could do it through
powershell like I did or just add the environment variable manually.
Once these few steps are done it’s time to actually create our UI extension. It will consist of only two files. Yes, you read that right… two files, and one of them is just a config widget.json file that looks like this.
{
"id": "poll-widget",
"name": "Poll",
"srcdoc": "./app.html",
"fieldTypes": ["Object"]
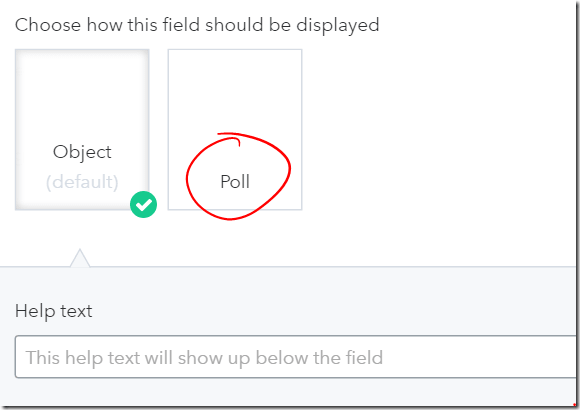
}This little guy simply tells Contentful the Id of our widget, which is to identify it internally. The name, which is the name that will show up in the Contenful GUI like this:
Then we’ve got the srcdoc which is the actual document that will present our widget in the Contentful GUI. And finally we have an array of fieldtypes which is the type (or types) that our widget will use internally to store its data.
So that’s the configuration and then we have the actual widget, which is just a plain old html file.
<!DOCTYPE html>

<link
  rel="stylesheet"
  href="https://contentful.github.io/widget-sdk/cf-widget-api.css"
/>

<script src="https://contentful.github.io/widget-sdk/cf-widget-api.js"></script>
<script src="https://cdnjs.cloudflare.com/ajax/libs/jquery/2.1.4/jquery.js"></script>

<div class="cf-form-field">
  <label>Poll heading</label>
  <input
    type="text"
    id="poll-heading"
    class="cf-form-input"
    placeholder="Enter your poll title"
  />
</div>
<div class="cf-form-field">
  <label>Poll questions</label>
  <ul id="poll-questions">
    <li>
      <input
        type="text"
        class="poll-question cf-form-input"
        placeholder="Add your question"
      />
    </li>
  </ul>
</div>

<script>
  //Lets look at the script separately
</script>
A couple of interesting things here. Firstly there’s a widget-css that we can reference to make sure our widget keeps the look and feel of the Contenful GUI. There’s a fairly rudimentary style guide that you can use to view the most basic controls and classes. Then we reference the widget client library which contains the API for communicating with the contentful back end. We also reference jquery. Lastly comes the actual HTML which is very rudimentary, a textbox for the title of the poll and a textbox for the first question. The interesting stuff comes in the scripts part, here’s what it looks like:
//This is the entry point for our widgets
//The init method gets called when the widget is finished loading and ready
window.contentfulWidget.init(function (widget) {
  //This is to make sure the iframe for our widget resizes appropriately when the window resizes
  widget.window.startAutoResizer();

  //widget.field.getValue() gets any stored value from the contentful back end and passes it to our update method
  updatePoll(widget.field.getValue());

  //bind any input to our savePoll method
  $("#poll-heading").on("input", function () {
    inputDelay(savePoll, 300);
  });

  //simple function to update our poll with any data stored
  function updatePoll(pollData) {
    if (pollData === undefined) {
      $("#poll-heading").val("New poll");
    } else {
      $("#poll-heading").val(pollData.heading);
      $("#poll-questions").html("");
      for (var i = 0; i < pollData.questions.length; i++) {
        var question = pollData.questions[i];

        addQuestion(question.text);
      }
      addQuestion("");
    }
  }

  //function that will be called whenever a question has changed
  function questionChanged($elem) {
    var questionVal = $elem.val();

    //If the value is empty we simply delete the question
    if (questionVal === "") {
      deleteQuestion($elem);
    }
    //If there's no question without a value, add a new one
    if (
      $(".poll-question").filter(function () {
        return $(this).val() === "";
      }).length === 0
    ) {
      addQuestion("");
    }

    //save the data
    savePoll();
  }

  //Create an html element for the question and bind any changes to the questionChanged function
  function addQuestion(text) {
    $(
      '<li><input type="text" class="poll-question ' +
        'cf-form-input" placeholder="Add your question" value="' +
        text +
        '" /></li>'
    )
      .appendTo("#poll-questions")
      .children()
      .on("input", function () {
        var that = $(this);
        inputDelay(function () {
          questionChanged(that);
        }, 300);
      });
  }

  //delete the question
  function deleteQuestion($elem) {
    $elem.parent().remove();

    //if there are no questions left, add a new one
    if ($("#poll-questions").children().length === 0) {
      addQuestion("");
    }
  }

  //save the poll to the Contentful backend
  function savePoll() {
    //create a json object to hold our poll data
    var poll = {
      heading: "",
      questions: [],
    };

    poll.heading = $("#poll-heading").val();

    $(".poll-question").each(function () {
      var questionText = $(this).val();

      if (questionText) {
        poll.questions.push({
          text: questionText,
        });
      }
    });

    //this method calls into the contentful backend
    //saving our poll as a JSON object
    widget.field.setValue(poll);
  }

  //this is a tiny little closure hack to make sure
  //we do not send an excessive amount of events to
  //the contentful api. If the user hasn't input anything
  //for the ms number of milliseconds we call the callback
  //function, otherwise we clear it
  var inputDelay = (function () {
    var timer = 0;
    return function (callback, ms) {
      clearTimeout(timer);
      timer = setTimeout(callback, ms);
    };
  })();
});
I first started out using blur instead of input as the event that would trigger the saving, but that turned out to be a mistake.
Blur triggers when you leave an input field which sounded kind of ideal at first to minimize the number of saves triggered, but
created an interesting problem. If the user changed something in the heading input field for example and then immediately clicked
the publish button it would result in this error:

What happened here is that my click event on the publish button actually registered before my blur event on the input field. If I clicked on the publish button again it saved nicely, but that’s obviously not an acceptable user experience, which is why I changed it to input events instead.
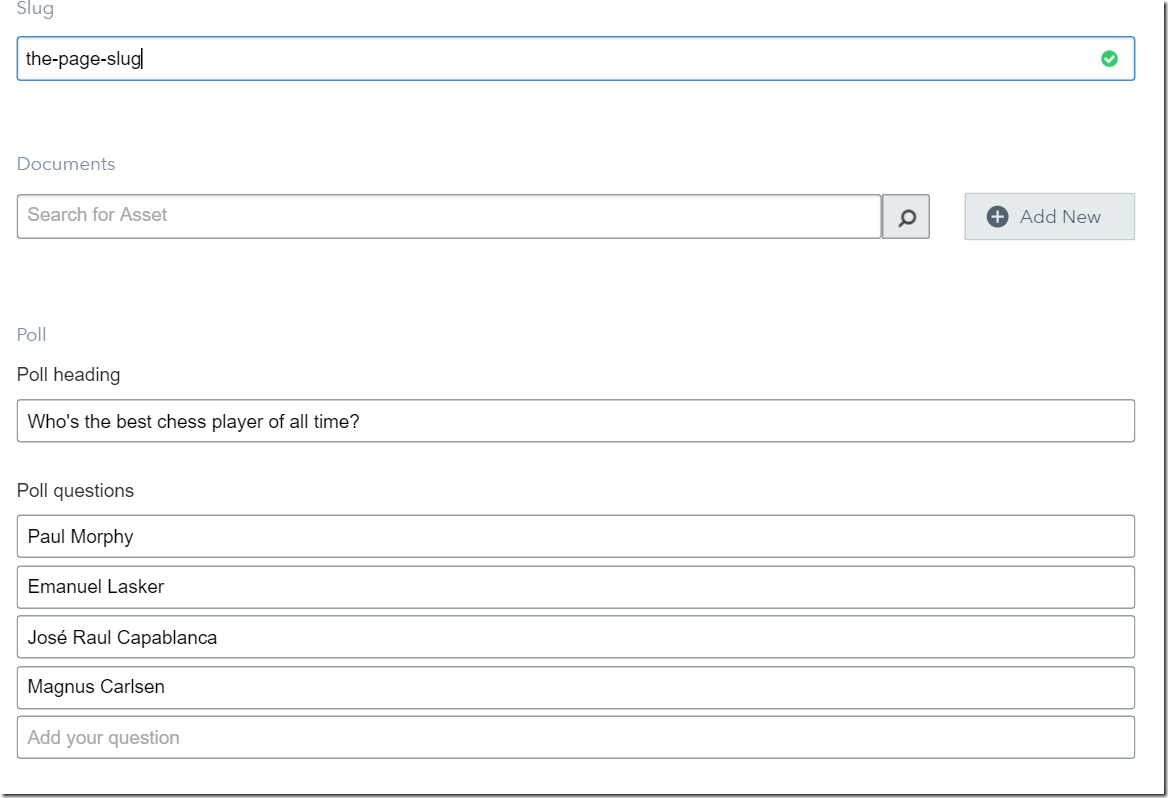
Here’s what the final property looks like in the Contentful UI, also including the slug and documents properties for comparison:
This very simple example only scratched the surface of what you can do with the UI extensions in Contentful. The widget object for example can be used to get a reference to the entire entry that’s being edited and can modify or read any field. This means we can easily build inter-dependent widgets that listen to changes of each others values and update accordingly. I’m looking forward to playing around some more with the api in the upcoming weeks and see what else you can create.